When I usually have the time and means to, I tend to make my own sandwich bread. I have tried a variety of recipes online, and more often then not, they’re a hit and a miss. Most people love to label their breads as “the best-tasting gluten free bread ever!” ….but…
I’ve come to discover, that whatever captions or titles people praise their recipes cannot always be believed. I’ve finally, after all my years of experimenting found some favorites though! I think for me, baking is a constantly evolving matter. It is simply because gluten free flour is not easy to get or are they cheap! Especially when you have to buy multiple bags of different types of flour just to make a cup for cup gf flour blend that actually tastes good. I tried all sorts. For the longest time, I used a hybrid wholegrain blend that I find is difficult to actually enjoy. The hardest flour to find in stores is definitely millet, but I often-times find quinoa flour to be a good replacement.
Oddly enough, my new favorite sandwich breads only require the simple rice flours and starches I can find in just about any store that sells bulk food items.
And since corn is not an option, I replace it with arrowroot starch, but lately, I find potato starch to be an excellent all-around substitute.
Simple is truly better.
I don’t really have space in my small apartment space to create a huge batch of flour. I can make an adequate size with a few medium jars.
The best flour blend I adapted is from A Little Insanity’s All Purpose GF Blend, for sandwich bread — I am now using a different blend entirely for muffins, sweet breads, and cookies.
She uses a very simple mixture of brown rice flour, white rice flour, tapioca starch, and potato flour.
To make a smaller blend that can make probably 2 sandwich bread loafs; I halved everything:
- 12 oz. Brown Rice Flour
- 12 oz. White Rice Flour
- 12 oz. Sweet Rice Flour
- 10 oz. Tapioca Flour
Honestly, if I had money, I’d probably make a huge batch just like her, but because I use a few different blends for certain purposes, I need to be sparse about what I can save.
I omitted the xanthum gum, or in my case, use guar gum since its not corn-based. I usually omit binders from the bulk flour blends I make and add them in later. People always say on their blogs to buy the best brands — but I buy my flours from local Asian markets. More often they’re just a bit cheaper. Actually the brown rice flour, white rice, and potato starches I buy is a Korean Brand I haven’t yet learned the name of and they sell it to you in big 2 pounder bags. I always buy a particular brand of tapioca starch, my mom uses to make Vietnamese tapioca shrimp dumplings. The sweet rice flour I use is by Mochiko, a Japanese brand, or I get a Thailand Tapioca flour packet found in many Asian supermarkets for just $0.99 (it used to be $0.89 though!).
What I also do, when making breads, is add in 2 tablespoons of potato flour (don’t confuse with starch of course), 1 tablespoon of pectin, and 1 tablespoon of the guar gum. It’s been working out for me so far. Just be careful to not add too much potato flour otherwise the mixture comes out too gummy, which can happen. But I’ve been making crappy crumbly sandwich bread for the past 2-3 years, so I’m okay with a bit of stickiness for once. But this post may not be the last. I’m always making bread, and always looking for ways to improve them. Sandwich bread at my local health food store is from $4-$10 for a very small loaf. It’s kind of nuts. When I make these breads myself, I make at least 10-12 slices! Almost double the amount they give you in stores. And if they do give you that amount of slices, they’re really small…. I am by no means rich, and live by the means, so I try not to waste any food. So if I make bad-tasting bread, I just eat it irregardless and just spread on lots of mayo and hummus… lol.
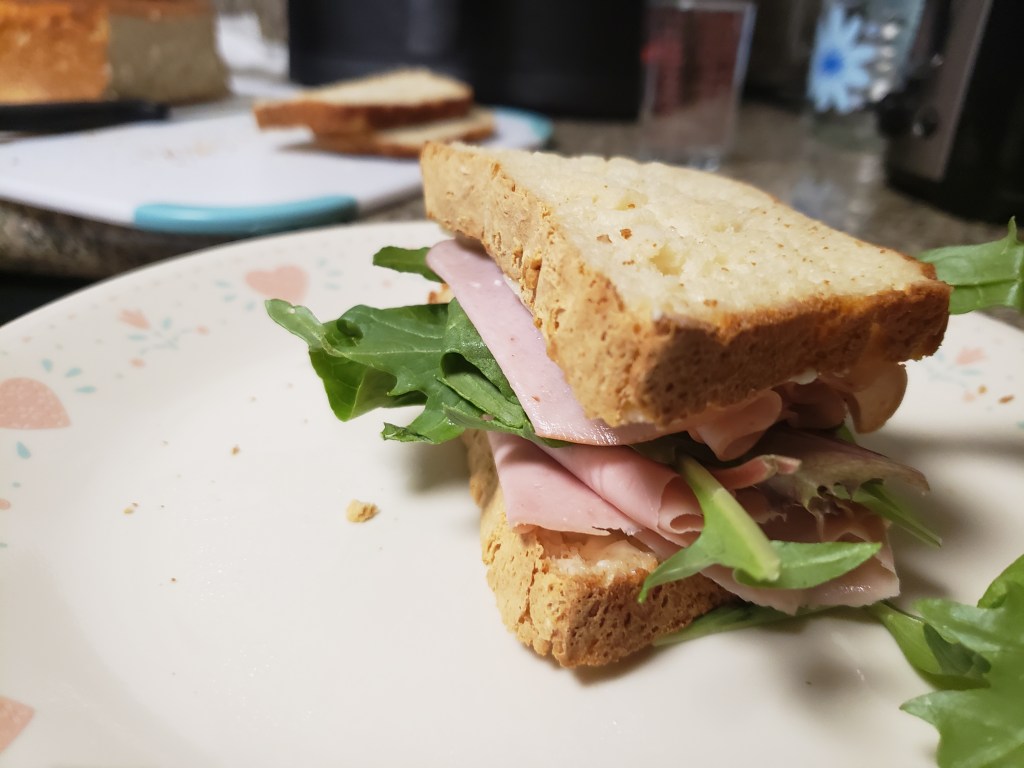
Also, something I’ve always done while growing up is to always toast my bread. It’s tasty and warm; cheese, mayo, or any kind of spread goes on a lot more easier. It’s rare I eat untoasted unless its fresh from the oven! So one of the most annoying things about going to afternoon tea these days, and ordering bread from a gluten free menu is that they never ever toast it. And you should with bread made from rice! Rice naturally hardens when cold — it’s flaky and each grain is really hardened, not tasty at all. I think people who curate these sandwich breads are really out of the loop and haven’t thought about what people who eat their breads are feeling. And I love afternoon tea. So I’ll eat whatever they make — usually what’s prepared in-between the sandwiches is what keeps it together and tasty. That’s why I’m happy to just make my own bread that I can toast up, and it doesn’t taste like crap! I can probably make my own afternoon tea now for gluten-free people. Just give me the capital to make a tea room!!
It’s been one of the most difficult challenges I’ve been facing as an allergy-prone eater, but if you just keep trying, you’ll overcome it!
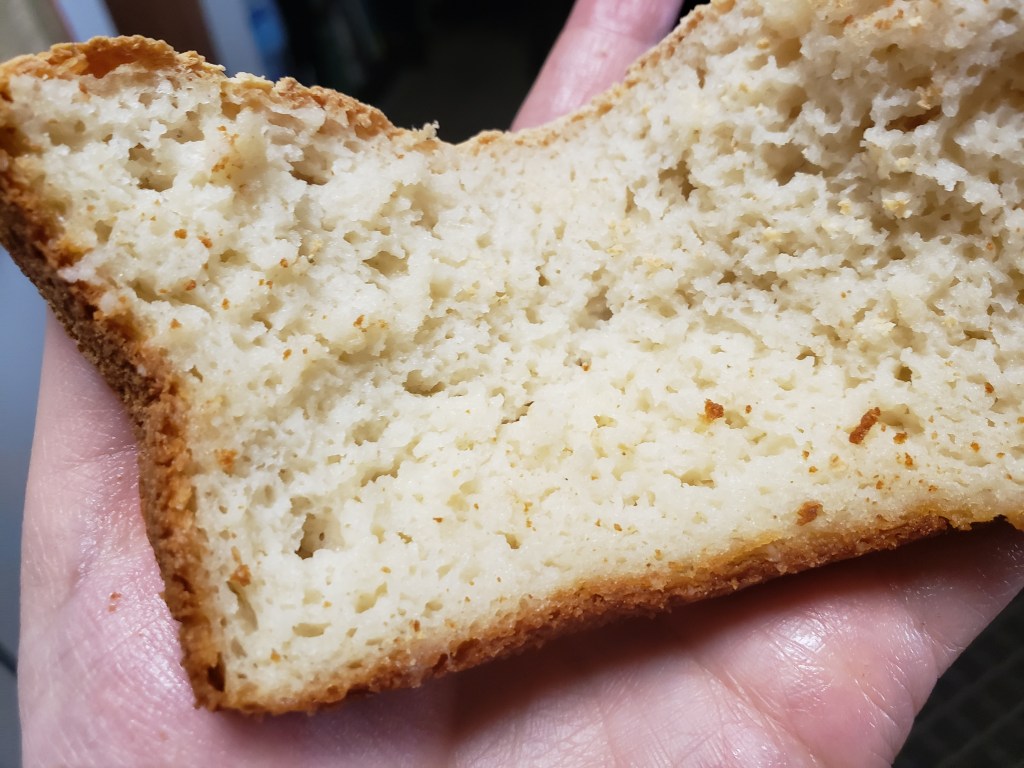
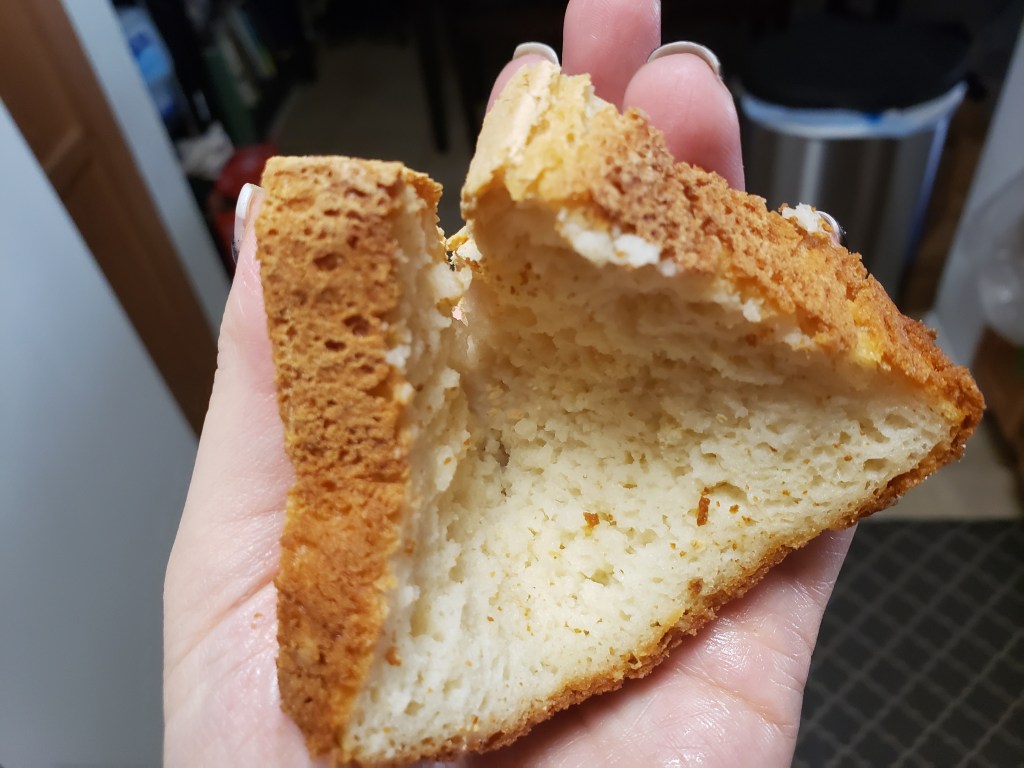
So far, I’m loving Celeste Noland’s GF Bread from her blog There is Life After Wheat— and it is one of the softest, so her title really holds true. Just keep in mind that the flour blend is incredibly important, and I know first hand if you use a bad blend, it comes out undesirable.
Other bread recipes I’ve tried calls for a bit of baking soda. I’ve just come to realize that the baking soda might be the reason why my bread’s texture sometimes comes out like sweet bread, which holds together a lot less well — it’s hard to explain but I think people get it. I decided on going yeast only, which was why I found her recipe intriguing.
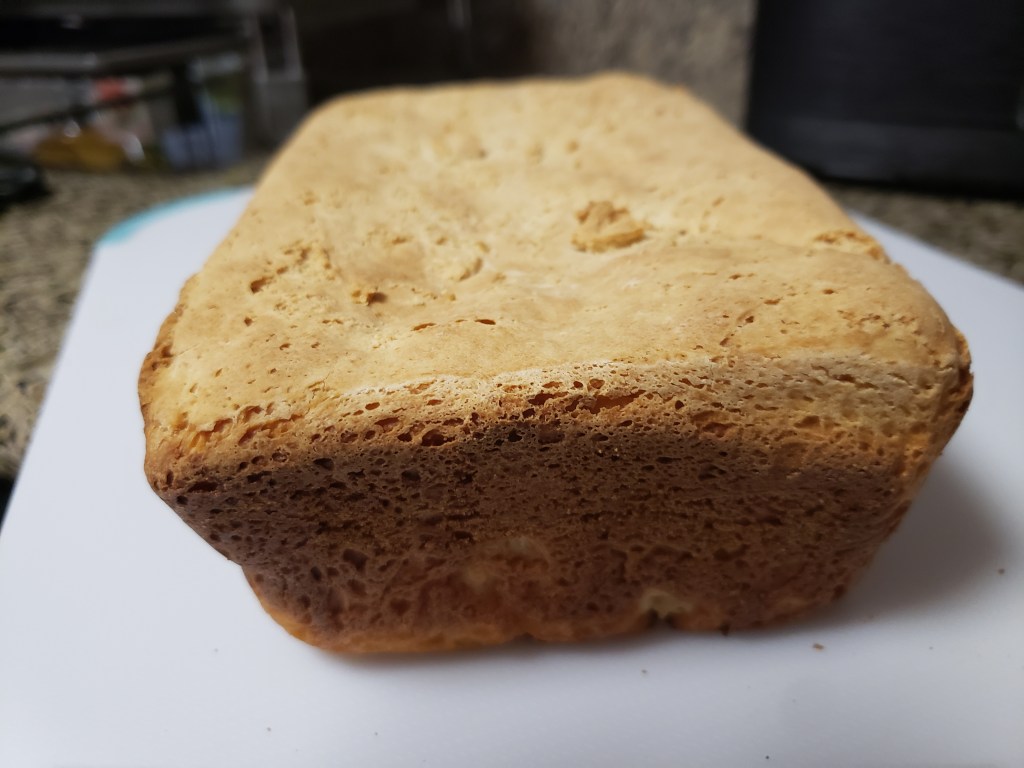
I used the above GF flour blend, and the bread came out pretty magical — minus the fact that it didn’t rise up as tall as I wanted it to. I tried to proof it separately, since I never have luck with not proofing the yeast with liquids.
Ingredients
- 3 cups of GF Batter Blend
- 1 packet of instant rise yeast
- 1 T guar gum
- 2 T gluten free potato flour
- 1 tsp salt
- 1/2 cup instant dry milk powder
- 2 T sugar or honey
- 1 tsp gluten free vinegar (white or apple cider)
- 1 egg, room temp
- 1 3/4 cup water, just warmer than room temp
- 1 T butter, softened (see notes for dairy free)
Instructions
- Mix together all dry ingredients.
- Next, mix together water and sugar/honey with yeast packet and proof for 20 minutes. (Celeste’s recipe says its not needed, but your mix needs to be at least 100 degrees F.
- Add vinegar, egg, water and butter after proofing.
- I personally used a hand mixer and mixed on medium 3-ish minutes (instead of going longer up to 5 minutes) because my kitchenaid hand mixer has problems with thick dough… Like all gf flour doughs, it’ll be a thick, sticky batter. Add 1 tablespoon of water if you need it to be more malleable and wet, which sometimes requires with these doughs. It should be like regular, wheat sweet bread dough that you can just pour into the pan.
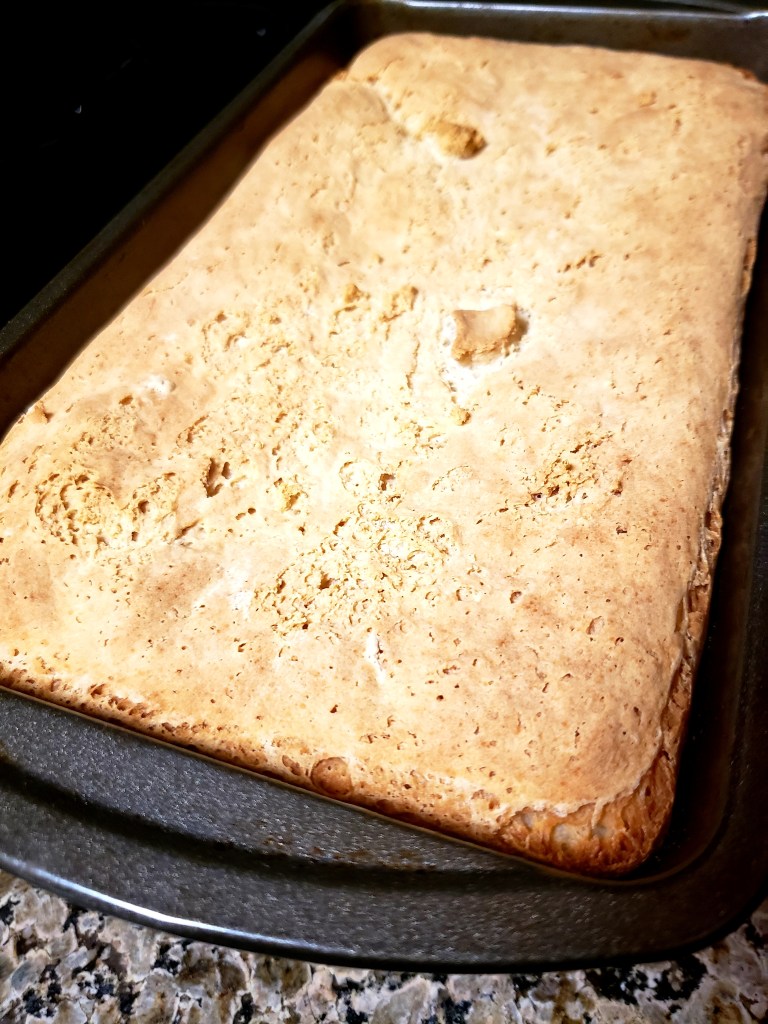
- Grease loaf pan, preferable an 8×9 if you want a good, high rise. Pour in dough. You can shape the dough with just a bit of water on your fingers and mixing spatula.
- Cover with a wrap/sheet of wax paper and/or towel and let rise in warm place until loaf has almost doubled in size. I preheated my oven to the lowest setting and turned it off (while prepping the loaf pan).
- Take bread pan out of oven and preheat to 350°.
- Bake for 40-50 minutes, until bread looks firm and is a nice deep golden brown on top. The top will fall if you take out too early. After its done, I like to cool in the pan for 5 minutes, and lay it on its side on a wire rack.
- Let cool completely before slicing.
- The bread is better not to be refrigerated and best kept in a freezer! Being plastic free, I use lots of wax paper and aluminum foil. I hope to buy a huge silicon bag for the freezer some day.
Small notes that I noticed:
- don’t use a big loaf pan
- always use fresh yeast
- definitely let it cool completely before attempting to cut
- I used potato flour, and it may have changed the texture a little, but I’ll keep experimenting
- I think its okay to use real milk instead of milk powder, but I bought it out of convenience because I can’t ever finish a milk carton, and neither can my bf (so we oftentimes buy a small carton, and it won’t last if I use it for bread all the time!) — that said, I have seen and used recipes that mixed milk into the water to proof the yeast, I think its fine too.
- I use an avocado oil spray, and its perfect because when cooked, avocado oil is tasteless.
There’s another gluten-free bread recipe I made the week before with JUST rice flour flour (I will be experimenting though with its taste because I used a very good Japanese rice flour and wonder if the rice flour here makes a difference) and tapioca starch. I’ll post that later when the time permits~
Here’s to delicious and good-looking sandwich bread!

Looks very delicious!
LikeLike
Thanks, Jamie! 🙂
LikeLike