I wasn’t really a huge fan of Japanese Curry for a long time — it may have been because the first time I ever had it, it was incredibly salty and difficult to eat; I can’t even remember where I had it — it may have been Curry House. My second time at a Japanese Curry House with a friend tasted a lot better, decent even, but I thought that it still wasn’t my favorite type of curry. It’s hard to beat delicious Indian curry, dipped with naan bread. I also cook Vietnamese curry every few months — my fondest memories are dipping it with some warm french baguette. I like to eat the outside crust first, dipped in the curry, and eat the soft bread insides for last.
But recently, my boyfriend has been getting a craving for it; he was telling me how his mom made it for him pretty often. Korean curry is pretty much like Japanese curry — they just like to eat it with kimchi – lol.
So I endeavored to find out how to make it from scratch, as a lot of the curry boxes that are commercially sold in supermarkets have a lot of allergens, most prominently wheat. I scoured the internet for some real, authentic homemade curry and I found a post by Nami at Just One Cookbook. She posts 2 parts: one for the roux, and one part for the actual recipe. And my curry came out delicious — so my post will be rather long as I’m just going to put it all into one to file away.
Here’s how I made my GF/allergen friendly version of the roux:
- 3 Tbsp melted butter
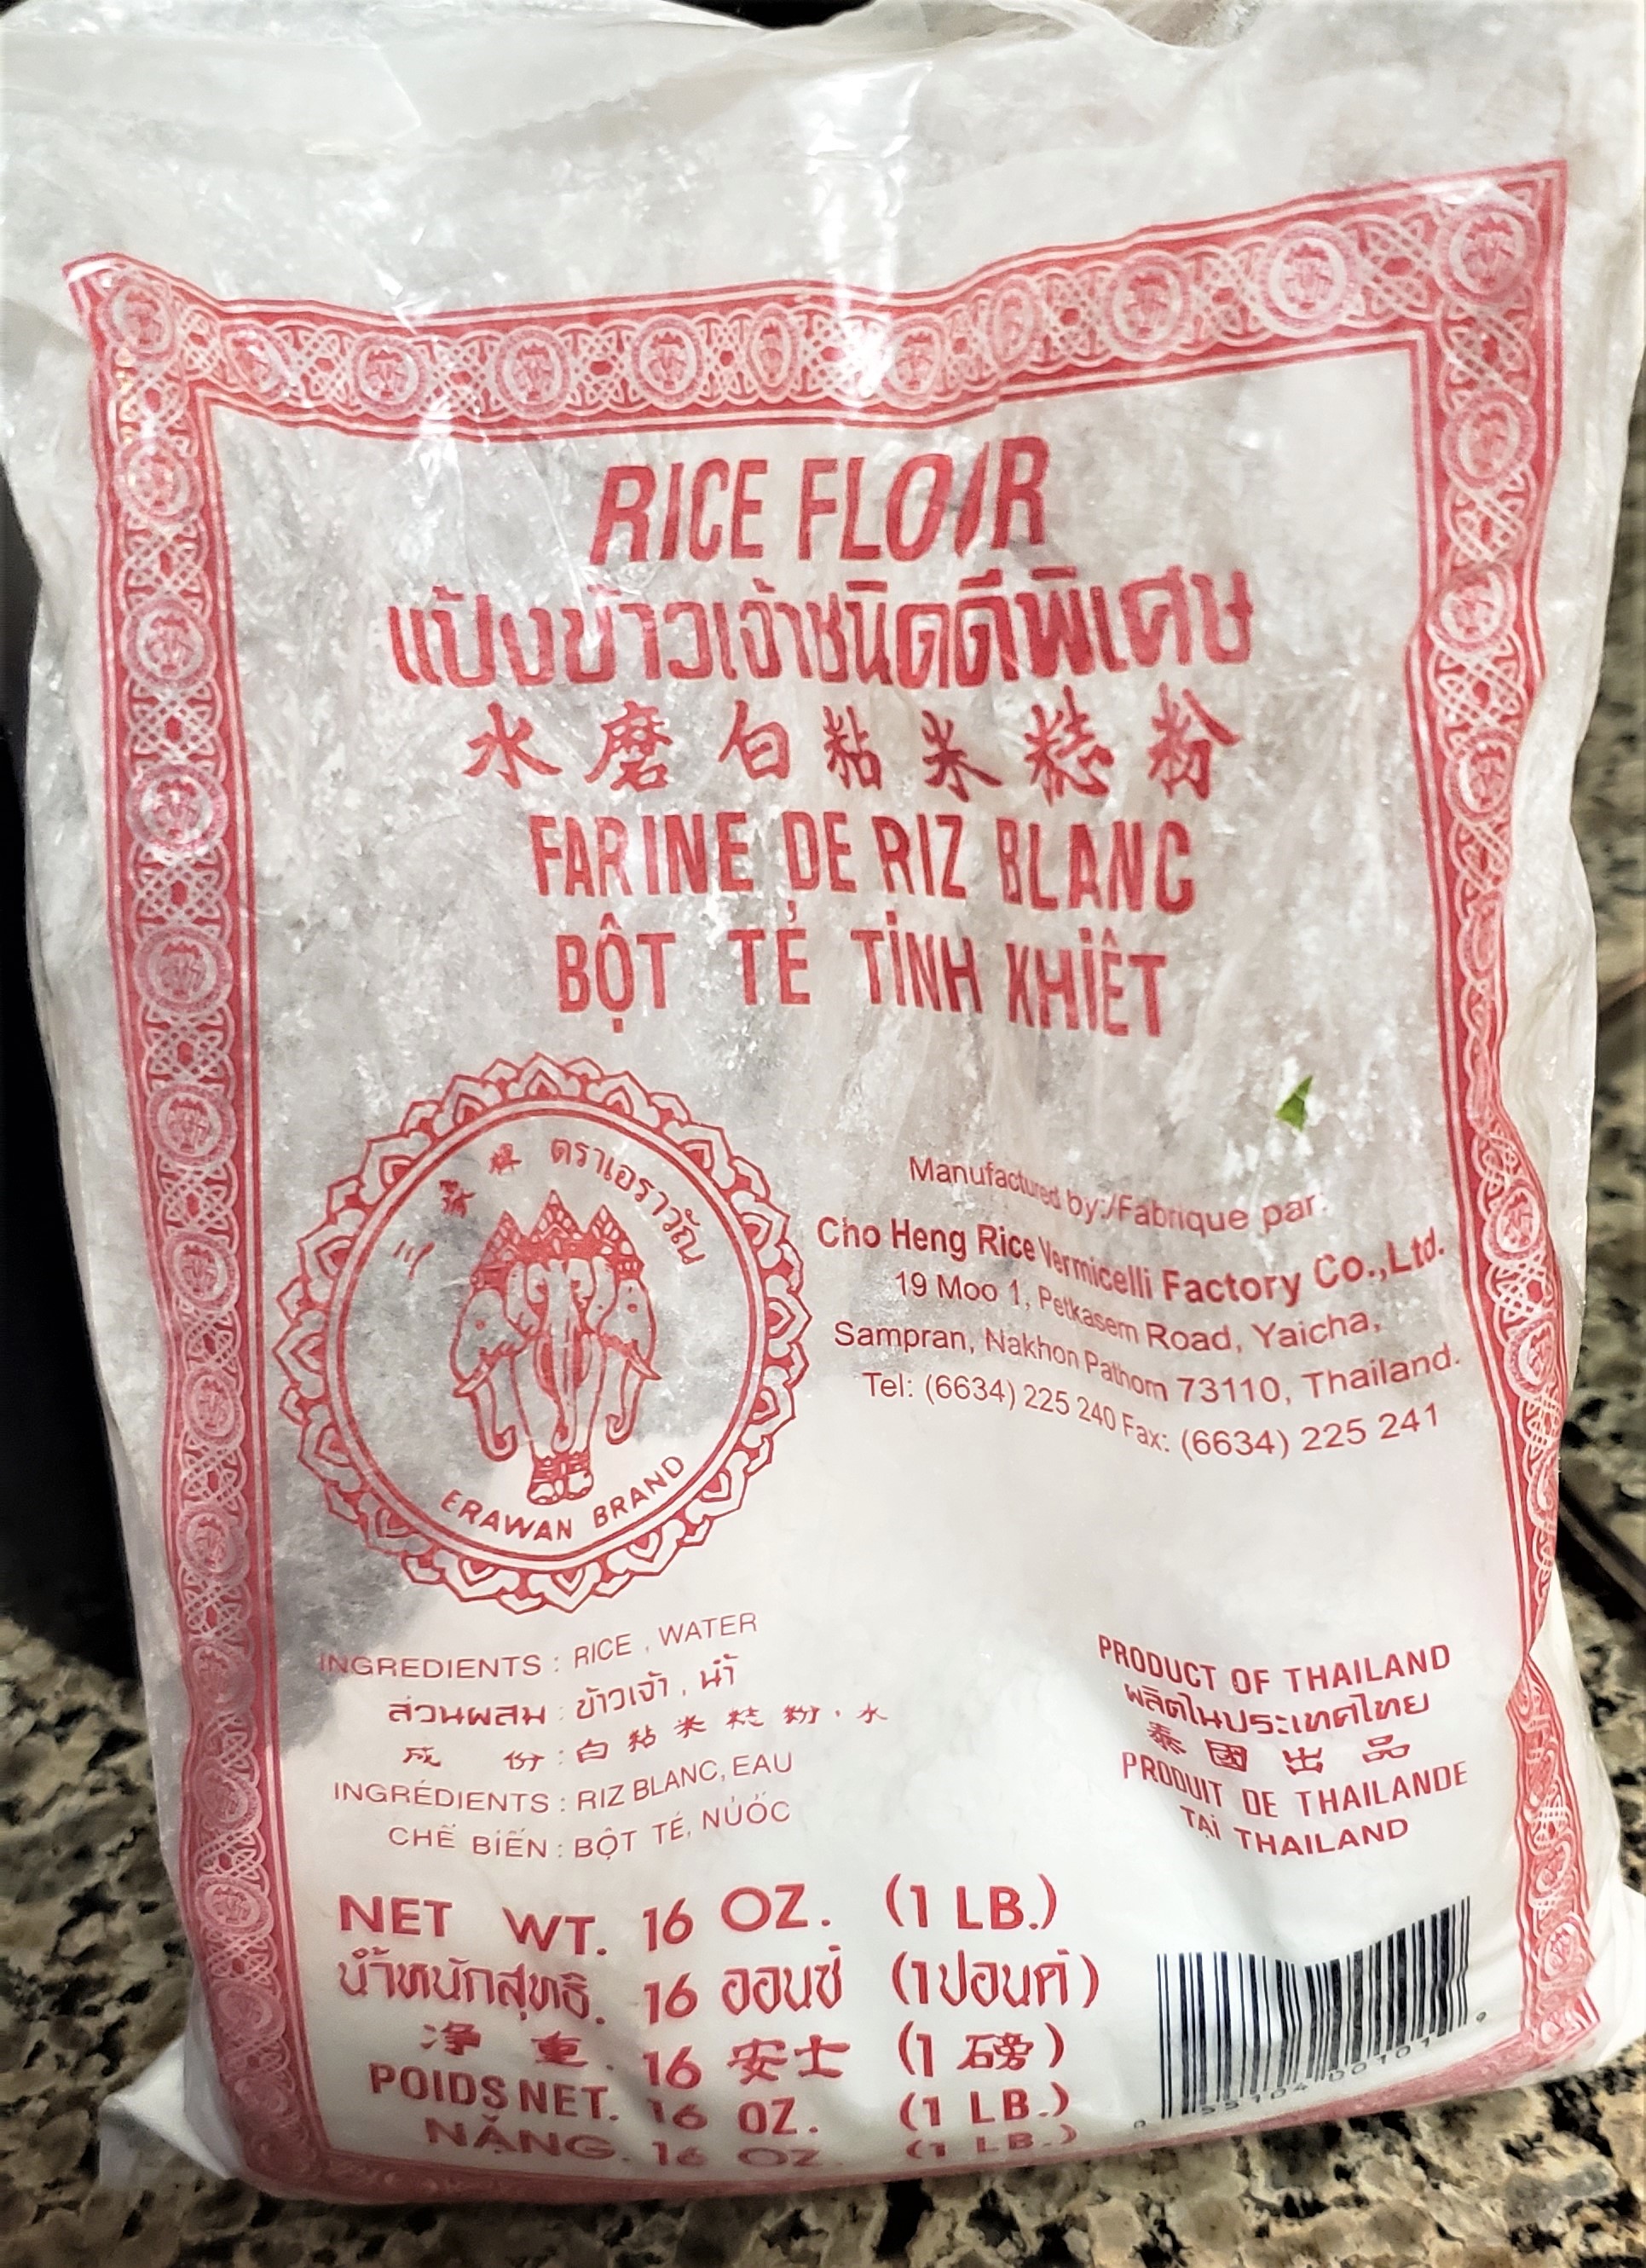
- 3 Tbsp rice flour ǂ
- 1 Tbsp arrowroot or tapioca flour
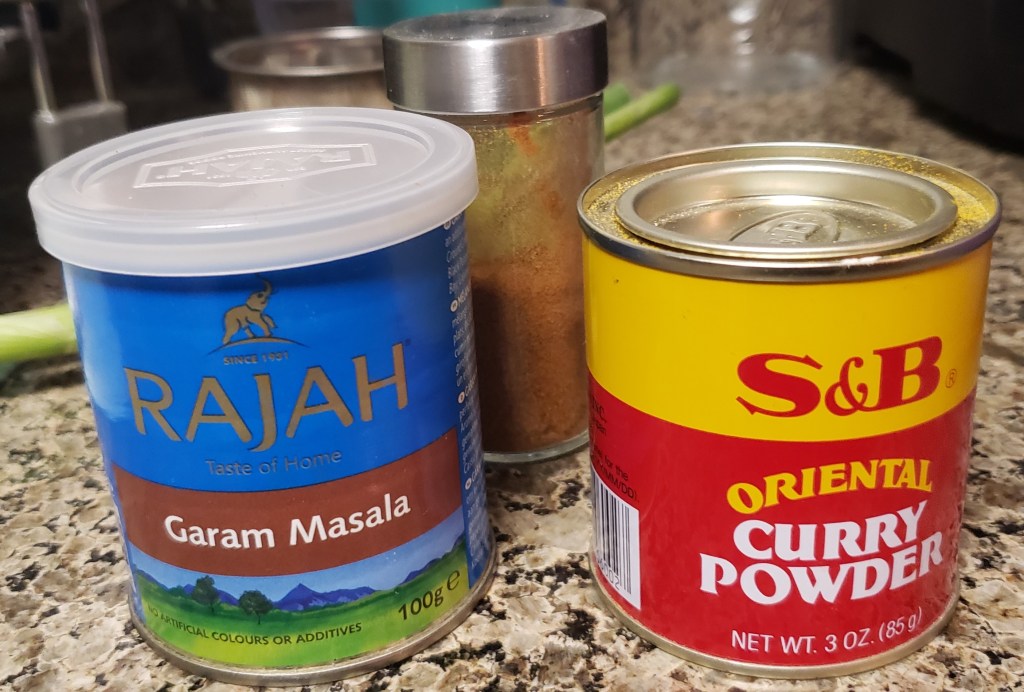
- 1 Tbsp curry powder
- 1 Tbsp garam masala
- 1/2 tsp cayenne pepper – original calls for 1/4, but I wanted an extra spicy kick (optional)
- Milk, half-n-half, and/or water as needed (optional)
Directions:
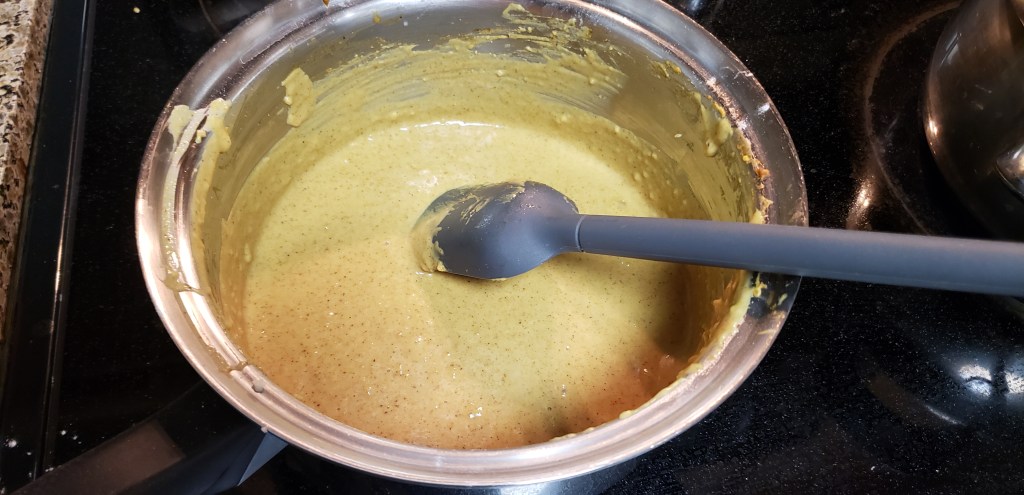
- You can either melt it in the pan or microwave butter for 30 seconds to be time efficient, and mix the rice flour and tapioca/arrowroot into the butter. Gently mix on medium low heat until combined, and continue to keep watch and stir for 20 minutes. It will get clumpy, but keep mixing. If it gets too stuck or looks like it may burn, add 1 tablespoon of milk or water and stir it in, as needed.
- After 20 minutes, add in curry powder, garam masala, and cayenne pepper, mix until fully incorporated.
- If you are cooking it for future use, turn off heat and let cool before enclosing into a container.
- If you have your broth ready, ladle in 2 scoops of liquid and whisk (recommended) until nice and smooth with no lumps. Afterwards, pour in mixture into your curry during the last 10 minutes.
ǂ I’m pretty sure you can just use 4 Tbsp of rice flour. I added more starch to make it more thickened. I actually did add 1 extra tablespoon at the very end since I added 1 cup extra water into the broth and needed to be thickened up a little more.
A big issue I ran into is that the flours reacted with the butter completely differently than the wheat. But don’t be upset because it will still come out if you don’t let it burn, just keep an eye on it. What happened was that the roux would thicken way too much, and too quickly. I don’t think it lasted even 5 minutes before it turned clumpy, and then super thick after I kept mixing. It actually turned the roux very dough-like, but don’t be scared because after adding in the liquid and mixing very well, it should become smooth just like how you make gravy. I kept the heat on low the whole time, and added a little bit of water and milk to keep it from burning to the bottom of my stainless steel pan. I don’t think it turned out any different from all the Japanese/Korean curry, milk adds quite a bit of depth and is a usual ingredient in southeastern Asian curries, but the milk in this is completely optional and water is fine.
The curry I used is by S&B, which is ironic — I bought this years ago when I was a college student not knowing much — its Japanese curry spice brand. How perfect. The garam masala that I bought the spices at a local small Indian supermarket, so its sure to be authentic, right? It was very aromatic and I actually had no idea what I was buying, I just grabbed a random one.
This curry recipe is also adapted from Nami’s Just One Cookbook curry recipe with changes to adapt to my allergen diet.
Curry Recipe:
Ingredients
- 1.5 lb boneless skinless chicken thighs, fat removed
- 2 carrots, cubed or slicked diagonally
- 2 onions, julienned or diced for ease
- 2-3 potatoes, square/cut into bite sized pieces and soaked in water for at least 30 minutes
- 2.5-3 cm fresh ginger, smashed with mortar and pestle, finely diced, or grated
- 3-4 cloves garlic, smashed with mortar and pestle, finely diced, or grated
- 1½ Tbsp vegetable oil, I used avocado oil or ghee
- 1 QT chicken stock or water (if using water, your broth will have a lot less body, you can cheat with half a pound more chicken or chicken bones)
- 1 apple, sweet like honey crisp or fuji
- 1 Tbsp sugar or honey — I ran out of a honey and had to use 3 sugar cubes ( ><”)
- salt and pepper to taste
- Japanese curry roux
- 3/4 Tbsp coconut aminos
- 1 tsp fish sauce (for umami and saltiness)
- 1 Tbsp ketchup your choice
Directions:
- Wash and prep chicken, cut into bite sized pieces.
- Prepare 2 pans, or 1 pan for convenience. Parboil chicken in salted water for 1 minute – wash pan if reusing.
- Reheat pan, a deep wok would be great, and add oil or ghee on high heat and add onions when white smoke can be seen on the pan. The onions should sizzle nicely, and saute until they’re nicely cooked until the skin is just turning see-through. Add your smashed, or chopped garlic and ginger.
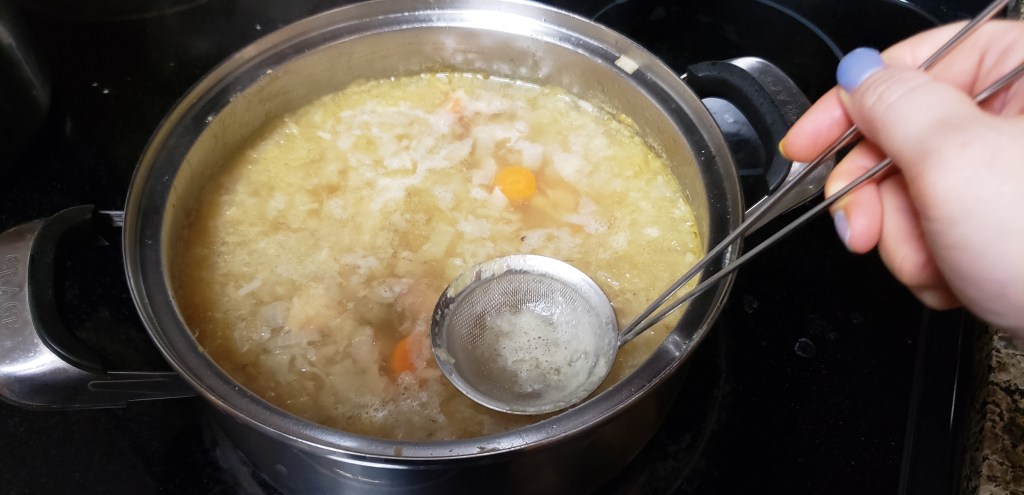
- Add chicken and lightly saute for another few minutes until lightly browned but not fully cooked. At this point, pour in your water or chicken broth. Cover bring to a boil on high heat, and let it boil for 5 minutes or so, while skimming off any scum that drifts up, and lower the heat to med-low and simmer for 30-1 hour, never more otherwise the chicken won’t be at its most optimal.
- Add a grated or pureed apple, and sugar or honey sweetener.
- Prepare your curry roux in the meantime.
- During the last 10 minutes, add in your prepped potatoes.
- When the roux and the soup are ready at once, add the roux into the soup, but temper it first with the soup before putting into the soup pot.
- Reboil the curry at medium high heat and add in the coconut aminos, fish sauce, and ketchup and mix well.
- Season with salt and pepper to taste if it needs adjusting.
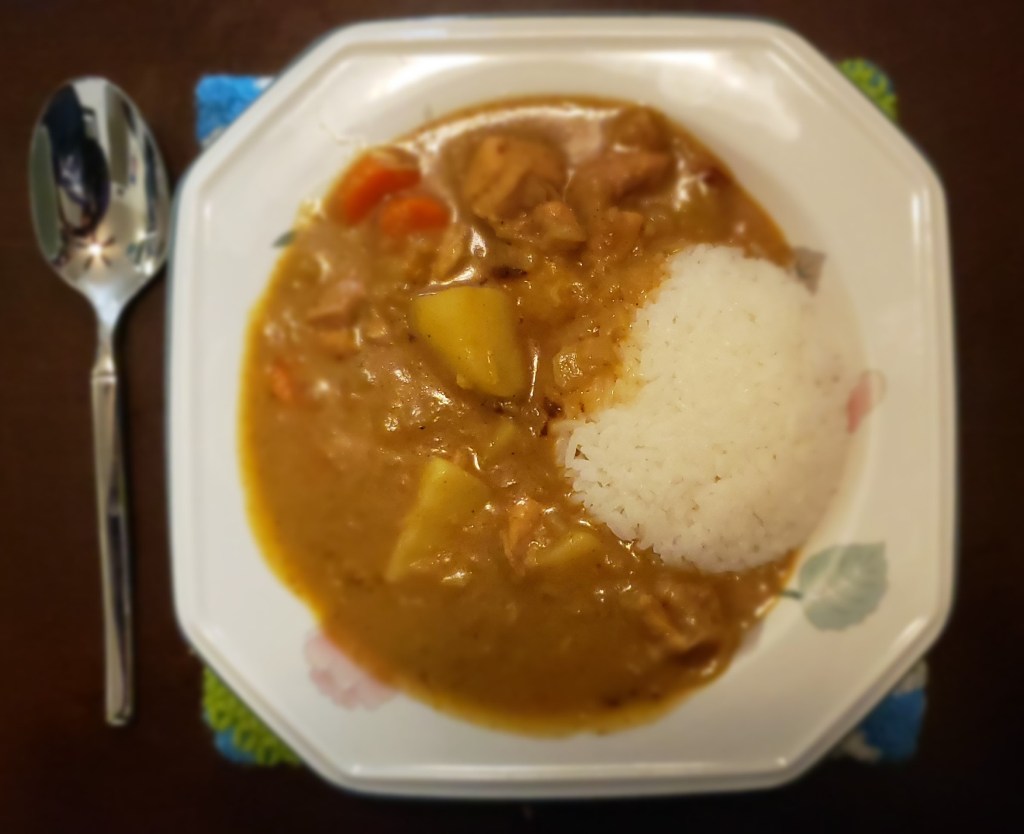
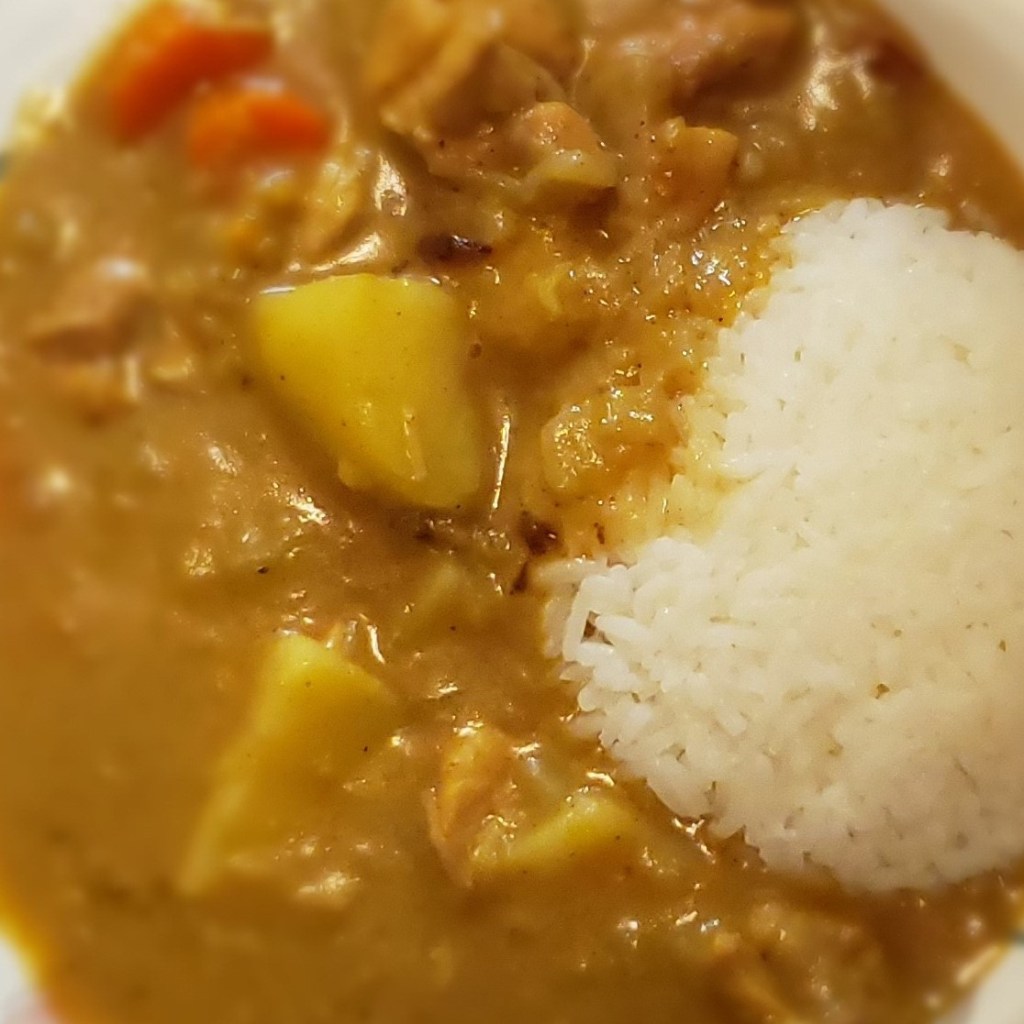
- Serve with freshly made rice.
- Optionally serve with toasted, seasoned gim and kimchi or fukujinzuke or rakkyō on the side.
I cooked the broth-y soup for about 45minutes – 1 hour, so the chicken thigh meats I used was soft, tender, and perfect, but you can certainly cook the broth for just 30 minutes if you’re über hungry. I drew this from my knowledge of cooking a lot of broth-y chicken soups from my Vietnamese heritage.
I added the roux in after the adding the potatoes so that the broth can thicken with the roux. Like I said at the end, I added an extra tablespoon of tapioca because I added too much broth — oops, but actually, it gave me an extra bowl of curry, so no worries. My boyfriend and I had this for 2 nights, and he is able to bring a packed curry bento/dosirak for lunch.
I like to smash my garlic and ginger together in a stone mortar and pestle because it saves so much time than cutting it. You can easily grab the skin out when you give it a good pound or two. Smashing in general is pretty fun to do, especially when you’ve had a tough day.
If I could recooked this, I would par-boil the chicken first to get rid of impurities instead of doing it with all the onions, garlic, and ginger added in, it made it very hard to take out the rising foam and scum that built on the top…. plus, I didn’t julienne the onions, I just diced them small to save time and so I wouldn’t have chunky onions if there was a chance.
For the soy sauce at the end — I substituted with a 3/4 Tablespoon of coconut aminos, and 1 teaspoon of fish sauce, and a non-high fructose corn syrup, organic ketchup brand.
At the end of cooking and upon tasting it, this recipe was a keeper. It was too good. Plus points, my boyfriend thought it was delicious too, and he’s not one to dole out positive comments on my cooking too often. -_- Stinker. My next endeavor of course is going to be some gf pork tonkatsu. Stay tuned.